Step-by-Step Project Creation Process #
You can begin your first project with our online cable sizing calculator by setting up a new one to organise your cable calculations.
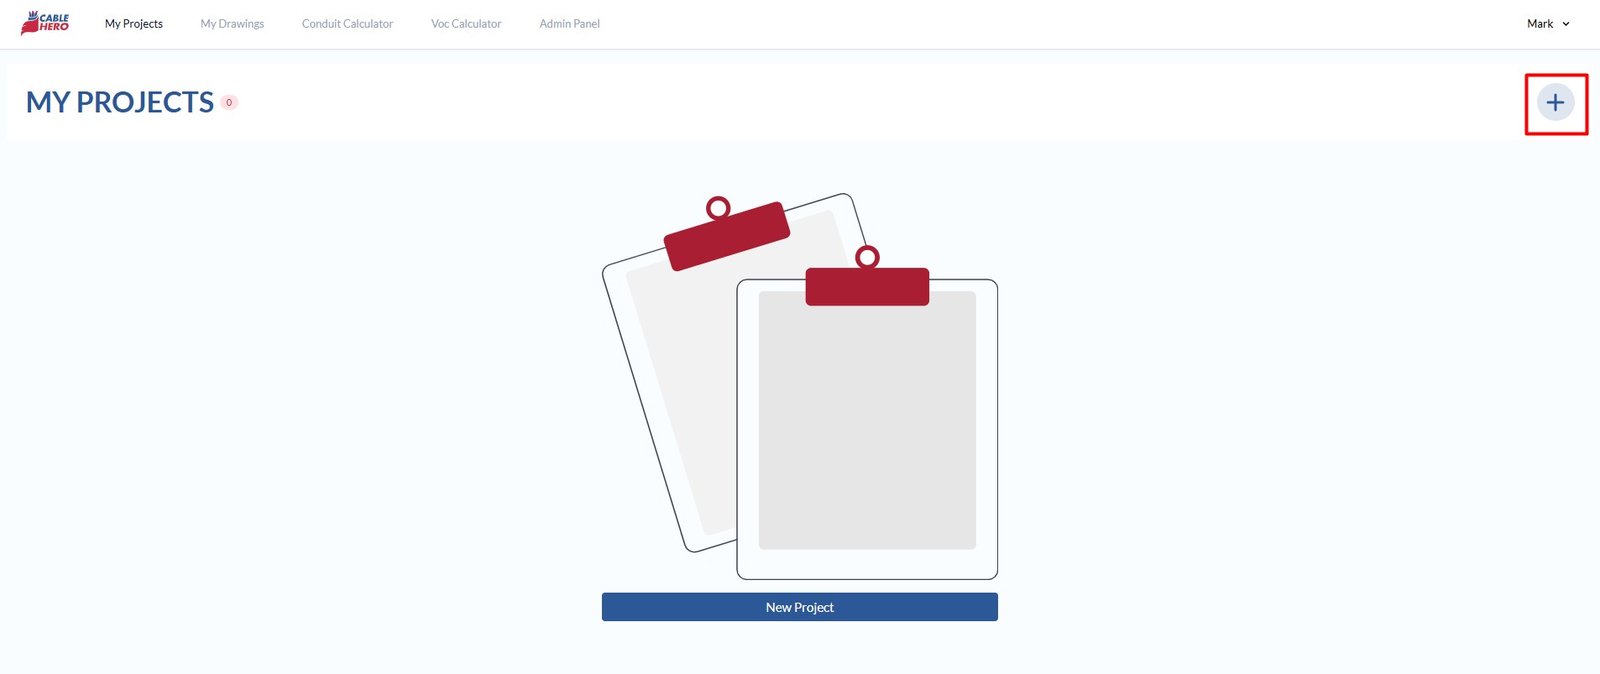
Step 1: Select New Project #
To begin, navigate to the Dashboard and select “New Project” or click the plus (+) icon located in the upper-right corner of the interface.
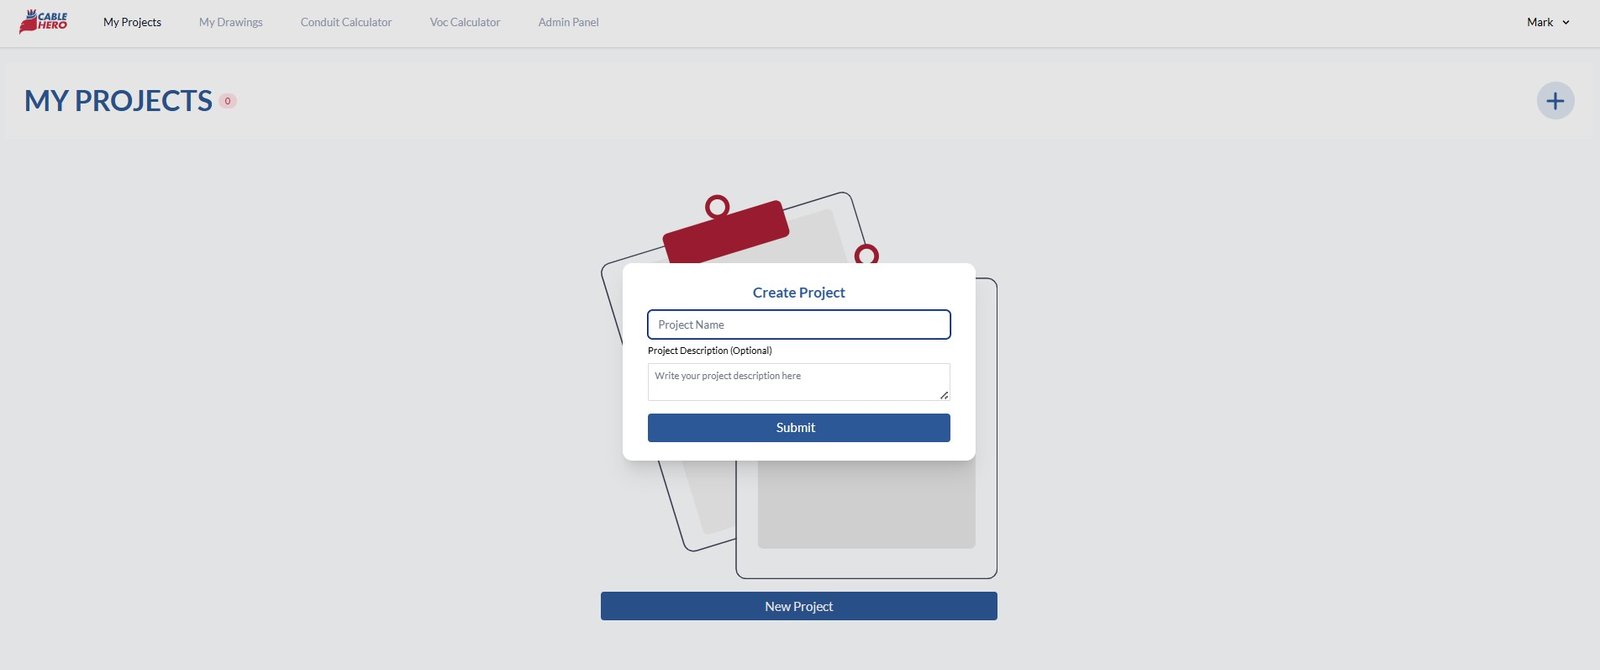
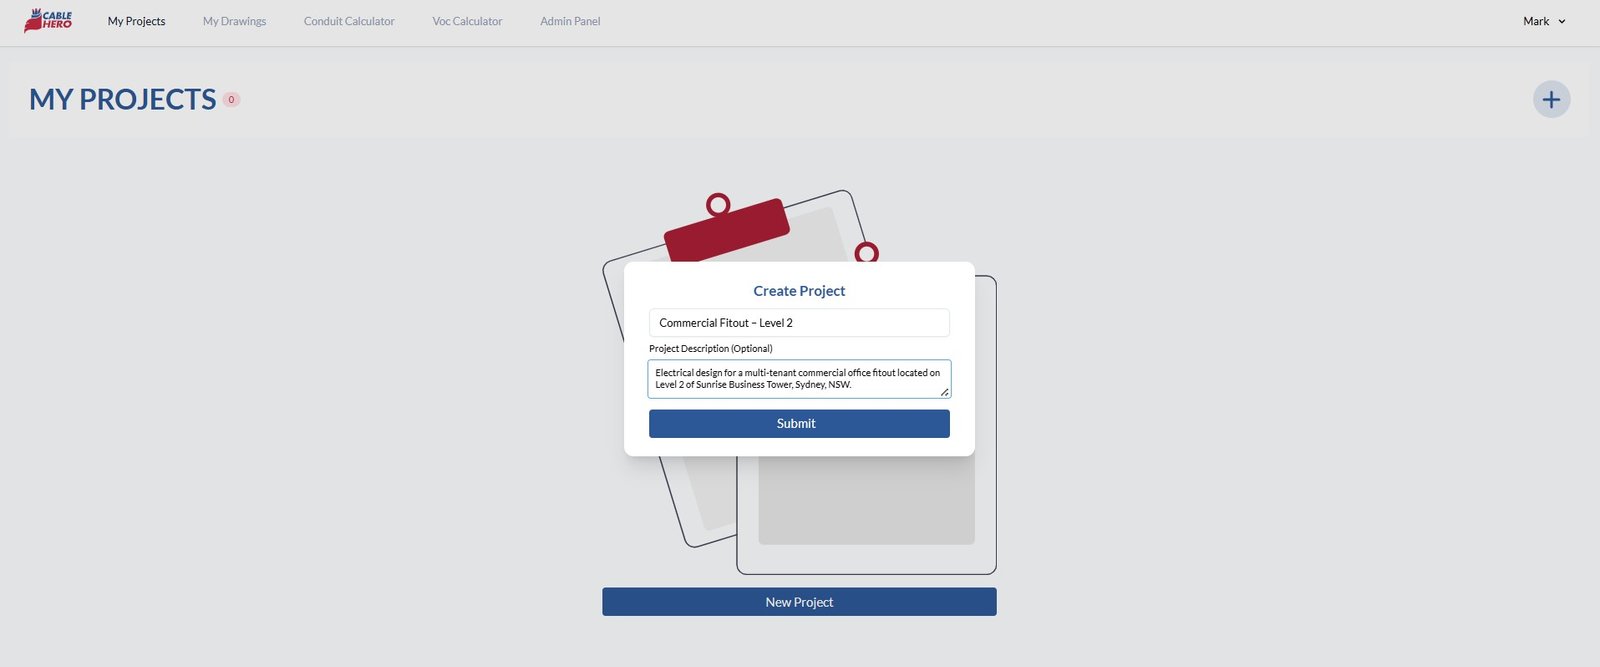
Step 2: Enter project name and description #
A dialogue box will appear featuring the details below. Simply input the project name and description to identify your project, and click Submit.
-
- Project Name – Enter a clear and descriptive title (e.g., “Commercial Fitout – Level 2”) for easy identification.
- Project Description – Optionally provide supplementary information, such as project location, scope, or specific design constraints.
Step 3: Auto-redirect to specific project #
Once done, the platform will automatically redirect you to the specific project workspace.
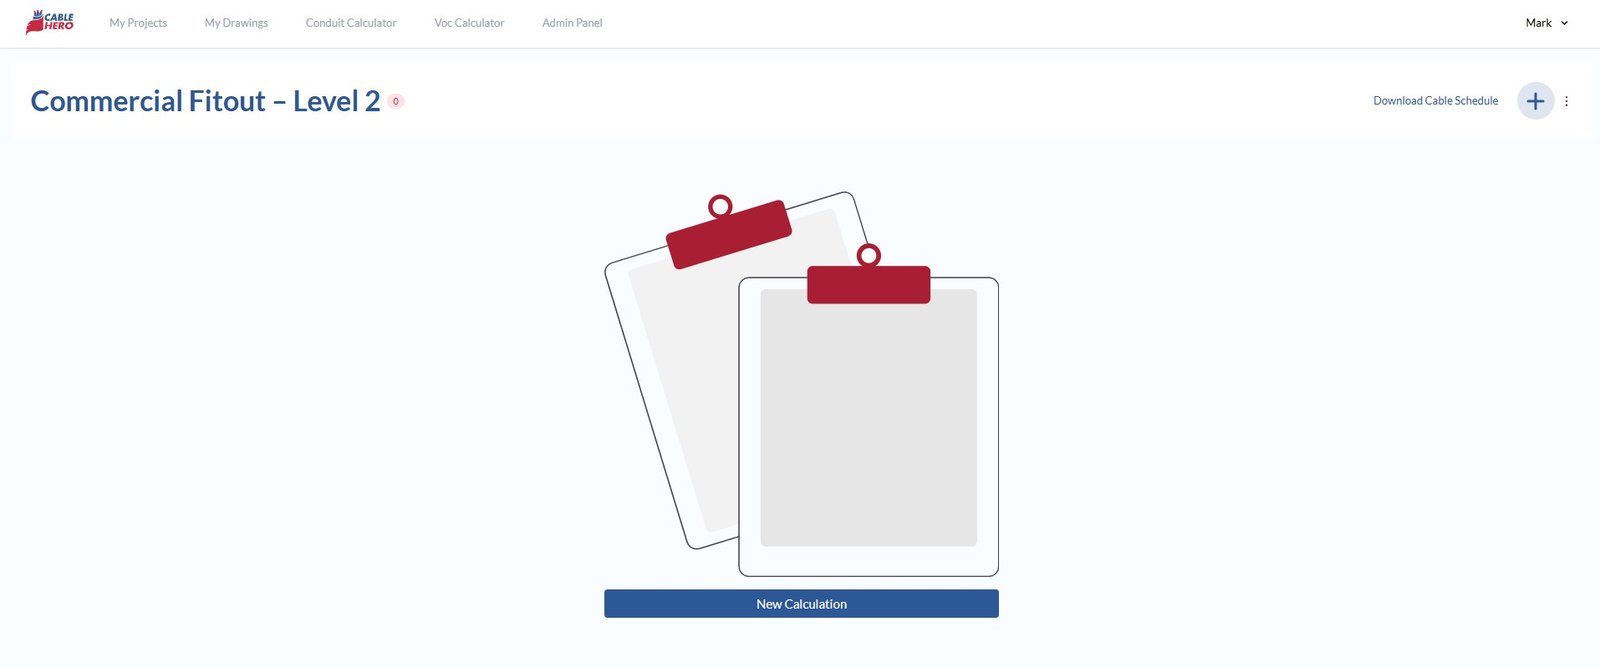
And that’s it — your first project is now set up. This workspace serves as your centralised hub, making it easy to manage input data, analyse performance metrics, and export documentation as needed. All calculations using our online cable sizing calculator associated with the project are automatically compiled and stored for easy reference and ongoing updates. To learn more, contact us today.